
Do Mountain Bike Tires have Tubes? (Tube vs. Tubeless Tires, Which is Better?)
It’s true that in recent years, tubeless tires have become increasingly popular, and almost all bikes come equipped with them. However, can a mountain bike have tubeless tires? The simple answer is “yes,” and it offers many advantages.
The benefits of tubeless tires are numerous, but some riders still prefer tubed tires. Why so? What difference does it make?
Don’t worry. In this discussion, we’ll look into the world of mountain bike tires and the reasons behind the ongoing debate between tubeless and tubed tires.
By examining the advantages and considerations associated with each option, you can better understand the choices available to you and make informed decisions based on your riding preferences and needs.
Which Mountain Bike Tires have tubes?
Mountain bike tires with tubes are commonly found on budget bikes or those equipped with cheap aftermarket tires. These inexpensive tires need to be constructed durably enough to be used without a tube. They typically have thin sidewalls, minimal puncture protection, and a rounded bead shape that doesn’t provide sufficient contact with the rim to keep the tire in place when inflated without a tube.
These tires have several drawbacks, including reduced traction, grip, and cornering stability. They are prone to punctures and wear out quickly compared to high-quality tires. Since the tire is the only part of the bike in contact with the ground, compromising grip risks rider safety.
Which Mountain Bike Tires don’t have Tubes?
Mountain bike tires designed to run without tubes are called tubeless tires. These tubeless tires are designed to create an airtight seal with the rim, eliminating the need for an inner tube. Therefore, tubeless mountain bike tires do not have tubes.
Tubeless tires are available across various brands and models, including popular manufacturers such as Maxxis, Continental, Michelin, Schwalbe, and many others. These tires are labeled “Tubeless Ready” or similar terminology on the tire casing, indicating their compatibility with tubeless setups.
Tubeless tires typically feature a square bead shape that increases contact with the hook design inside tubeless-compatible rims. This bead shape helps to maintain a secure fit and prevent the tire from coming off the rim when inflated. Additionally, tubeless tires often have thicker sidewalls to enhance puncture protection and durability.
By setting up your mountain bike with tubeless tires, you can enjoy benefits such as running at lower tire pressures for improved traction, reduced pinch flats risk, and the tire sealant’s ability to self-seal small punctures.
How to Tell if Bicycle Tires Are Tubeless or Not?
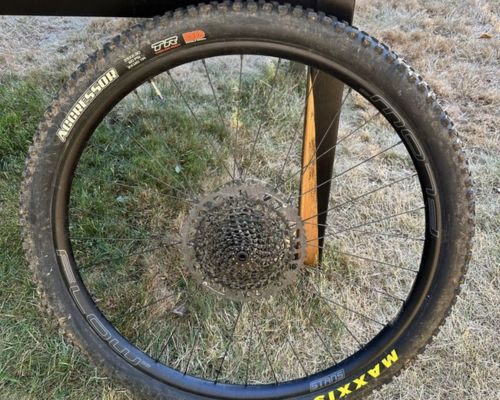
To identify whether a bicycle tire is tubeless, there are a few key elements to look for on the rims and sidewalls. One indicator is the presence of markings that read “Tubeless,” “TL,” or “UST.”
These markings signify that the tire is designed for tubeless setups. Examining the valves can provide further confirmation, as tubeless tires typically have valves secured to the rim with a metal collar.
The abbreviation “TL” means “Tubeless,” indicating a tubeless tire.
Another designation you may come across is “UST,” which stands for “Universal Standard Tubeless.” UST is a standard for tubeless tires and rims, ensuring specific shapes and dimensions that promote brand compatibility. If you see “UST” markings, the tire and rim adhere to this universal tubeless standard.
One distinguishing feature of tubeless tires compared to clincher and tubular tires is how the valves are attached. Tubeless tire valves are secured to the rim using a metal collar, while tubular tire valves directly enter the tire’s inner tube.
By knowing these characteristics, you can easily differentiate a tubeless tire with a metal valve and collar from a clincher or tubular tire with a rubber valve extending out of a hole in the rim. Observing the rim markings and valve attachment will help determine whether a bicycle tire is tubeless.
Tube vs. Tubeless Tires for Mountain Bikes
Mountain bikers are often confused whether they should have tube or tubeless tires for the bikes. To keep you away from this confusion, we will discuss PROs and CONs of Tube vs. Tubeless tires for MTBs.
Pros of Installing Tube Tires on Mountain Bikes
Cheaper and Faster to Install
Tube tires are generally cheaper than tubeless tires. They require fewer components and materials, resulting in lower overall costs. This can be particularly beneficial for riders on a tight budget or those who prefer a more economical option. Installing tube tires is relatively easy. You must insert the tube into the tire, mount it on the rim, and inflate it. This process requires minimal time and effort, making it convenient for riders who want to return to the trails quickly.
Tubes are readily Available
Another benefit of tube tires is that they are widely available in various sizes and designs. This makes them easily accessible in most bike shops and online retailers. This availability ensures you can find replacements or spares whenever needed without having to search extensively or wait for specific products to be in stock.
Patching Tube is Easy
One advantage of using tube tires is quickly fixing a puncture. By carrying an extra inner tube in your backpack, you can swiftly replace the punctured tube while on the go, allowing you to continue riding without significant delays.
Repairing the punctured tube at home when you have the necessary tools and time. Ensure you get the right size tube with the correct valve for a proper fit.
Tubes are Compatible with All Rims and Tires
Tube tires offer compatibility with a wide range of rims and tires, eliminating the need to purchase new components. This makes them a convenient choice as you can use them with your existing setup without any modifications.
Additionally, spare tubes and patches for tube tires are incredibly affordable. A decent quality tube can cost just a few dollars, and a patch kit, which can keep you rolling through multiple flats, can be purchased for less than $5.
Carry a Light Repair Kit
Repairing a flat tire is a straightforward task requiring only a few essential tools: a spare tube, tire levers, and a reliable patch kit. Unlike tubeless setups, there’s no need to carry additional items such as plugs, a sewing kit, super glue, or sealant.
This simplicity streamlines the repair process and reduces the bulk and weight of the necessary repair gear, making it particularly advantageous for bicycle tourists who value lightweight packing. Carrying these basic tools gives you everything you need to handle most flat tire situations efficiently.
Cons of Installing Tube Tires on Mountain Bikes
More Frequent Tire Flats
One major drawback of tube tires is their vulnerability to getting flats. Even a small staple or a tiny shard of glass can easily puncture the tube, leading to a flat tire. This issue becomes particularly significant in desert environments where thorns are common.
Cycling with Low Tire Pressure is a Big NO
When riding with your tire at a low PSI (pounds per square inch), there is a risk of a pinch flat. This occurs when you encounter an object that causes your tire to compress and hit the rim. This results in two small holes that resemble a ‘snakebite’ pattern. Ensuring sufficient air in the tube is essential, preventing the tire from pinching and contacting the rim. In practice, you typically need to run your tires with tubes around 10 PSI higher than tubeless setups.
Handling Inner Tubes is Challenging
Handling inner tubes can be challenging, especially when repairing them and when you’re unfamiliar with the process or haven’t done it before. It is important to know the right tools and techniques to fix a puncture properly. There are also different inner tube types, each requiring a specific repair approach. You should know a basic guide before handling inner tubes for efficient results.
Before beginning, ensure you have tire levers, a pump, and a patch kit on hand. Begin by deflating the tire fully. Next up, when removing, carefully insert a tire lever between the tire and rim, progressively working around the circumference to detach one side of the tire.
Once removed, inspect the inner tube for damage. When installing a new tube, partially inflate it and fit the valve stem through the rim’s hole. Then, position the tube within the tire, avoiding twists or pinches. To finish, carefully remount the tire on the rim and slowly inflate it to the recommended pressure.
Pros of Installing Tubeless Tires on Mountain Bikes
Less Frequent Tire Flats
One of the main reasons why many people choose tubeless tires is to minimize flats. Tubeless setups self-repair punctures. When a puncture happens, the sealant inside the tire automatically fills the holes, sealing them and preventing air from escaping. This feature significantly reduces the flat likelihood, as the sealant repairs punctures as we go.
Ride Comfort
When you come across rocks, ruts, or potholes while riding, tubeless tires absorb the impact and conform to the shape of the obstacle, preventing them from bouncing off. As a result, you’ll enjoy a smoother and more comfortable ride with reduced jolts and bumps. This feature is particularly advantageous for riders using hardtail mountain bikes that lack suspension systems. By optimizing tire pressure in a tubeless setup, you can experience a more forgiving ride.
Easy to Repair Flats
If you experience a significant puncture or tear in your tubeless tire that causes it to go flat, there are options to repair it without removing the tire from the rim. Tubeless tire plugs fix most punctures or tears, offering a convenient and straightforward solution. In the case of larger gashes caused by objects like rocks, you can sew them up using a strong needle.
Applying a small amount of superglue can seal the repair. If these methods fail, you can always install a tube as a temporary fix. These repair options provide flexibility and ease of use when dealing with different types of tire damage. This allows you to get back on the trail with minimal hassle.
Reduce Tire Weight
Tubeless setups generally reduce overall tire weight compared to inner tubes. Without the tube weight, you can enjoy a lighter wheel assembly which also reduces overall mountain bike weight. Additionally, tubeless systems allow you to run at lower tire pressures, which improves traction and comfort without sacrificing performance.
You can maneuver turns at higher speeds with improved traction without losing control. Ascending steep hills becomes more efficient as you can generate more power without spinning out.
Can go Back to Tubes Anytime
Switching back to tubes is easy if you try a tubeless setup and decide it’s not for you. Just wash out the tire sealant and install a tube again. This flexibility allows you to easily transition between tubeless and tubed systems based on your preferences or specific requirements.
Cons of Installing Tubeless Tires on Mountain Bikes
Expensive to Install
Tubeless tires and their compatible wheels are generally pricier than the tubed parts. Additionally, if your current setup cannot be converted to tubeless using a conversion kit, you may need to invest in new tubeless-specific components. Moving to a tubeless setup also requires purchasing additional items, such as tire sealant, rim tape, valves, a tubeless patch kit, and a tire sealant injector.
These costs can accumulate quickly, making the initial investment higher than traditional tube setups. It’s important to consider these factors when switching to a tubeless system.
Tubeless Tires Directly Burp
The term burping refers to a tire detaching from the rim, causing the tire to deflate and the sealant to spray out. This issue in tubeless tires can arise when running at low tire pressure and encountering a sharp rock with precise impact. It is not limited to off-road riding; even road bikes equipped with narrow, tubeless tires can experience this problem.
You have to Carry Messy Sealant
Sealant is essential for patching purposes as it acts as an adhesive. Sealant handling can be messy and inconvenient. It can spill, messing up your gear, clothes, and hands. In the event of a tire gash, the sealant may splatter, exacerbating the mess. Dealing with sealants can be unpleasant due to their messy nature.
Tubeless Gears are not Available Readily
Finding tubeless sealant, rim tape, patches, tires, etc., can be extremely challenging when touring in developing countries or remote regions. It is worth noting that some small bike shops in these areas do not stock tubeless equipment. In such circumstances, coming prepared with your own tubeless equipment in your tool kit becomes essential. In the worst-case scenario where sealant or reliable rim tape is unavailable, switching back to using tubes is always an option.
Final Thoughts
In summary, tubeless tires offer benefits such as self-repairing punctures, improved ride comfort, and reduced flat likelihood. However, they can be initially more expensive to install and require sealants when touring.
On the other hand, tube tires are cheaper, quicker to install, and have fewer additional components. They are more prone to flats but convenient for some riders.
Ultimately, the choice between tube and tubeless tires depends on personal preferences, budget, and riding conditions. Consider the pros and cons of each option before deciding.


One Comment